Jean expressed an interest in carving having seen some amazing work by members of the Sussex Woodcraft Society, so with trepidation I handed over my carving gouges
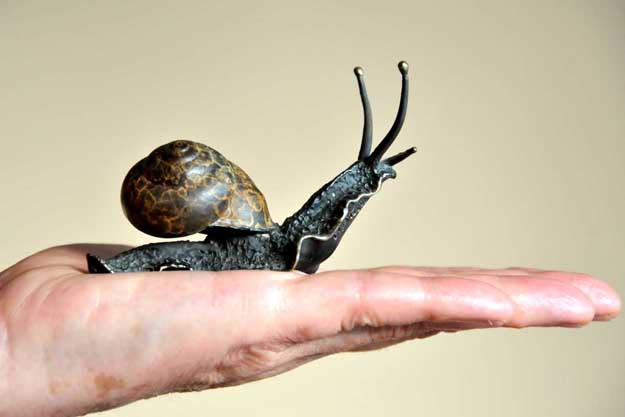
Jean says "I wanted a simple project to start with, but for some unknown reason I chose Brian - partly because I already had a handy model in the form of a bronze ornament that would not wander off too quickly"
An article detailing brian's creation was printed in Carving Magazine issue 141 click the link to the left to read the pdf
 This is the life
- or birth -
of Brian
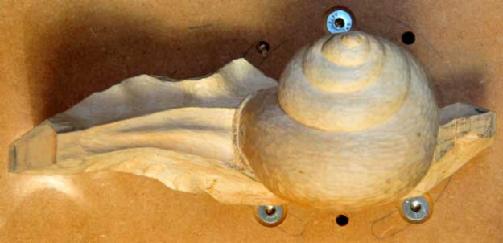
The model
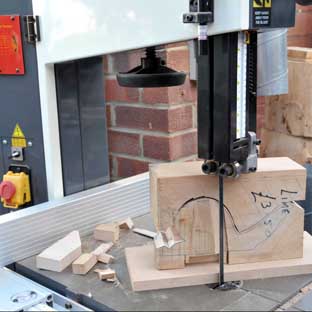 Lime wood was selected for this project as it is easy to carve
and holds a good level of detail, and Chris just happened
to have a block handy. First I scaled up my model to fit the size
of the block. Having done a rough sketch on the block it was
sent to the workshop for bandsawing
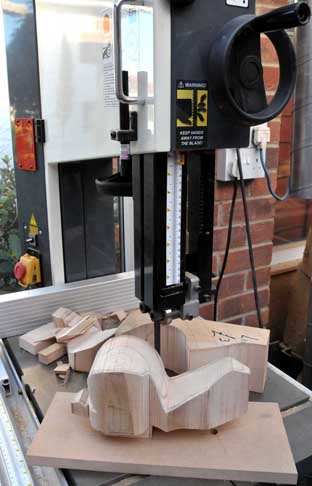
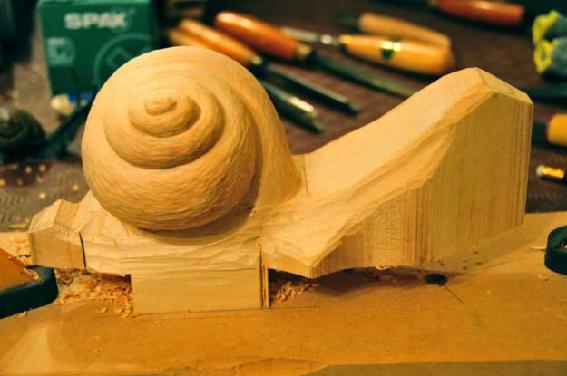
Having bandsawn Brian's profile on three sides, and cut a mounting
block on the bottom, the waste was discarded and he was screwed
to a base plate for easy clamping to the work surface
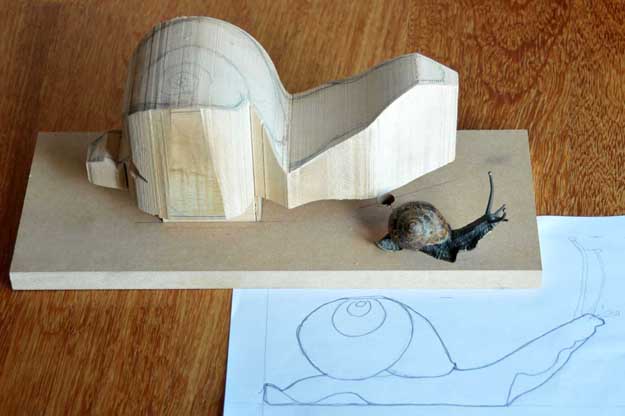
The 'model' inspecting his
drawing and sawn block
of Lime, mounted to a
base board of MDF prior
to approving the carving
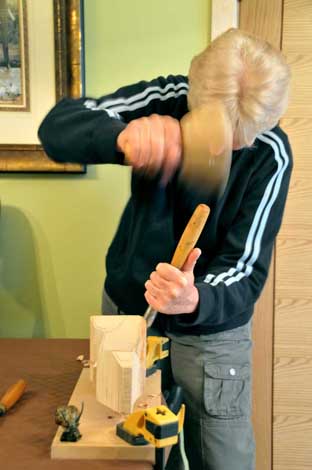 I never realised that bashing the **** out
of Brian would be so much fun
[Jean got into the swing of carving in her
first session and was so engrossed that
I had to remind her to stop for dinner,
that was the only way I could stop the
racket - it was like living with a
woodpecker - Chris]
Yes I am carving in the dining room and Brian is
clamped to the dining room table, but the table
is well protected, and seeing as I clear up the
mess, I wanted to do it in the warm!
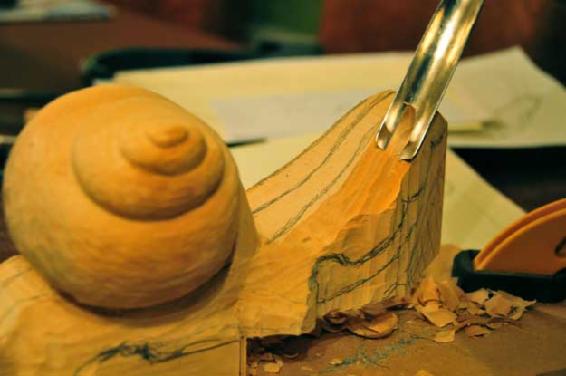
 After some initial rough shaping
I drew the spiral on for his house
- what I didn't realise is that as
soon as you have drawn on your
blank, you carve it away and then
have to do it again
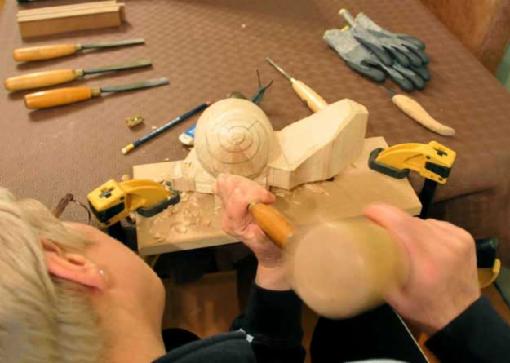
 It takes a lot of concentration to ensure
that I only cut away the bit I want
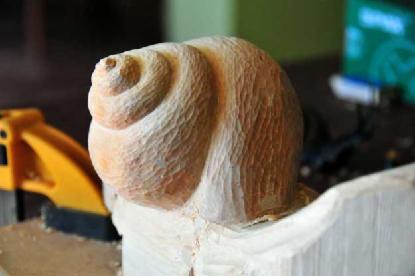
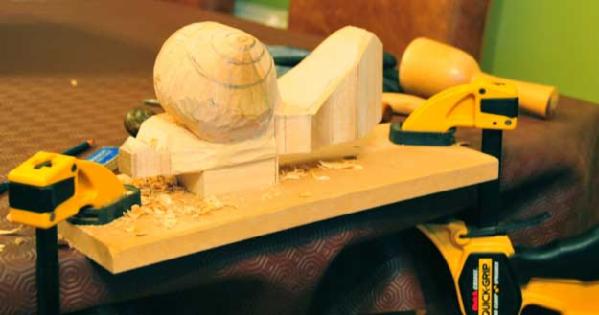
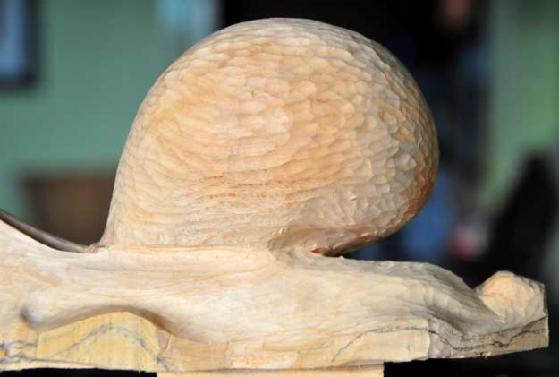
His house is taking shape And now I am beginning to add some texture
 With the top of his house looking
reasonable I need to carve away
some of his body to get to the
underneath of his shell
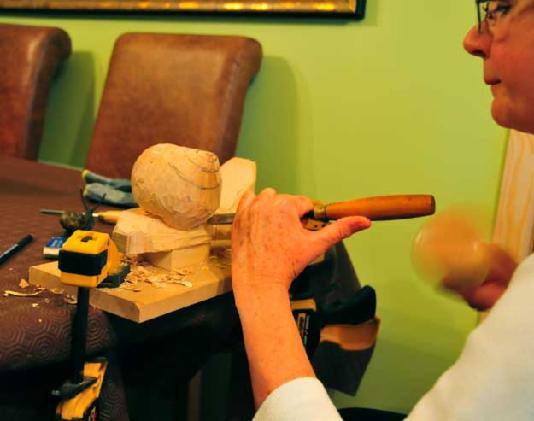
I thought it would get easier as I
progressed, but it's getting more
nerve wracking as I'm getting
more into it and I don't want to
mess up his neck and head
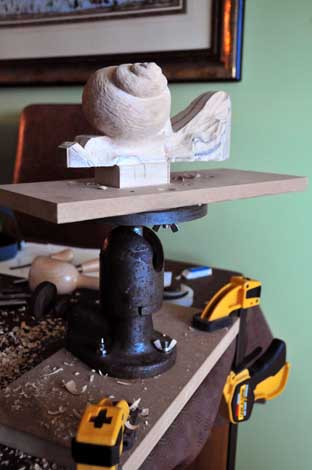
As I now need to keep turning Brian to get all around his shell and body Chris
progressed, but it's getting more
nerve wracking as I'm getting
more into it and I don't want to
mess up his neck and head
As I now need to keep turning Brian to get all around his shell and body Chris
has mounted him on a hydraulic carving clamp so that I can quickly rotate him
in any direction and lock him solid to carve at the best angle
 As I have been progressing
with more detail, actually
seeing the finer details
has been progressively
more difficult.
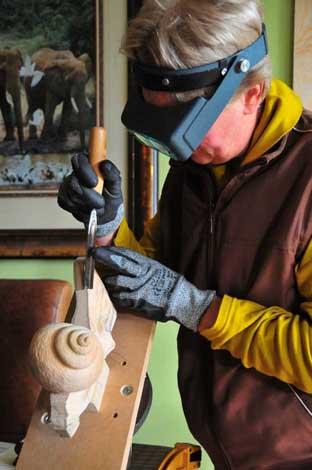
So Chris got me an
Optivisor which is a
binocular magnifying
glass on a head band.
WOW
now I can see all of the
imperfections in amazing
detail
OK, the gloves, well they
are special cut resistant
gloves, guess how I found
out that I needed these
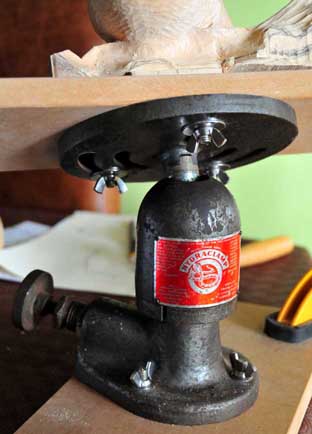 This clamp is amazing, it's now so muchquicker to spin him round to gain
access to whatever bit of him I need to carve. It's much more comfortable
As I have been progressingwith more detail, actually
seeing the finer details
has been progressively
more difficult.
So Chris got me an
Optivisor which is a
binocular magnifying
glass on a head band.
WOW
now I can see all of the
imperfections in amazing
detail
OK, the gloves, well they
are special cut resistant
gloves, guess how I found
out that I needed these
This clamp is amazing, it's now so muchquicker to spin him round to gainaccess to whatever bit of him I need to carve. It's much more comfortable
too, as I can retain a relaxed posture, which makes the carving process
a lot easier
The clamp is a Spencer Franklin Hydraclamp bought secondhand from
Leeside Tools in Yapton
Brian is now progressing well with a good shape to his body. I am currently
working on his tail, trying to not knock off any vital bits as the grain makes
this a bit vulnerable
 Having
done some more work to his
Having
done some more work to his
body, it's back to refining his shell.
Every time you do one bit it seems
that you need to go back to another
area to ensure that he retains his
balance overall. Sometimes you can't
finish a section until you have carved
away another bit to gain access
 Having shaped most of the top of Brian's body
The clamp is a Spencer Franklin Hydraclamp bought secondhand from
Leeside Tools in Yapton
Brian is now progressing well with a good shape to his body. I am currently
working on his tail, trying to not knock off any vital bits as the grain makes
this a bit vulnerable
Having
done some more work to hisbody, it's back to refining his shell.
Every time you do one bit it seems
that you need to go back to another
area to ensure that he retains his
balance overall. Sometimes you can't
finish a section until you have carved
away another bit to gain access
Having shaped most of the top of Brian's bodythere was a glaring ommission - tentacles!
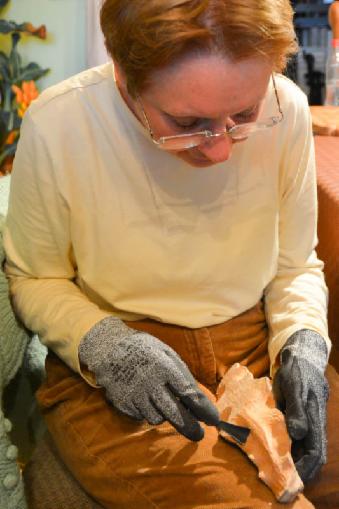
A friend from the Sussex Woodcraft Society
came to the rescue, and provided several
pieces of bone, saying "you'll need these"
This presented another challenge - how to
mount his tentacles.
Chris came up with the idea of using magnets.
That way when they get knocked they simply
come away without causing any damage
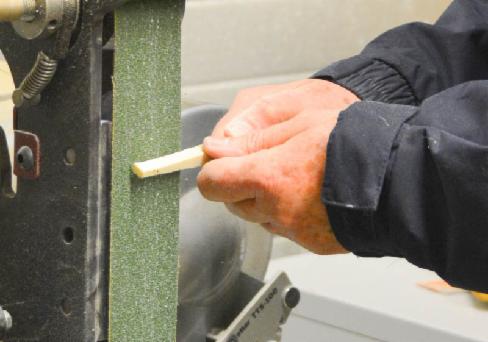
Here I am starting the shaping process using
a belt sander
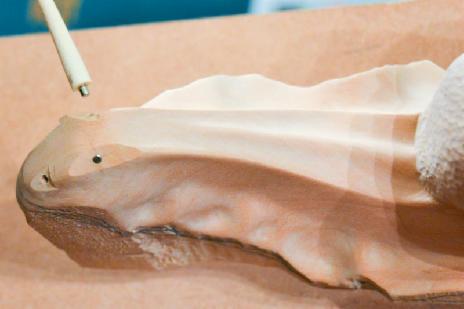 Brian had his body magnets inserted using a tentacle
The flats were filed so that his tentacles would point
in an appropriate direction, and were later blended
into his body, leaving a small pad for the tentacles
to sit on
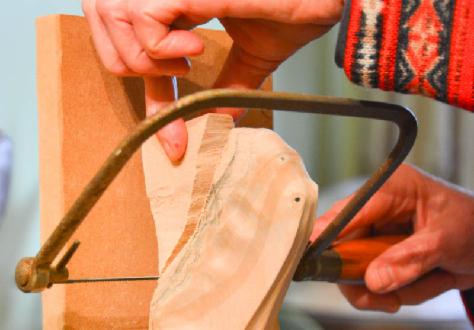 I left his chin on whilst shaping his neck for rigidity
But finally the time came for a bit of drastic surgery
I could barely cope!!!
Having unrestricted access to Brian's tummy, I started trimming
First I used a Kutzall cutter in a rotary tool to create flowing waves
to his 'skirt', then refined the shape with gouges
came to the rescue, and provided several
pieces of bone, saying "you'll need these"
This presented another challenge - how to
mount his tentacles.
Chris came up with the idea of using magnets.
That way when they get knocked they simply
come away without causing any damage
Here I am starting the shaping process using
a belt sander
Brian had his body magnets inserted using a tentacleThe flats were filed so that his tentacles would point
in an appropriate direction, and were later blended
into his body, leaving a small pad for the tentacles
to sit on
I left his chin on whilst shaping his neck for rigidityBut finally the time came for a bit of drastic surgery
I could barely cope!!!
Having unrestricted access to Brian's tummy, I started trimming
First I used a Kutzall cutter in a rotary tool to create flowing waves
to his 'skirt', then refined the shape with gouges
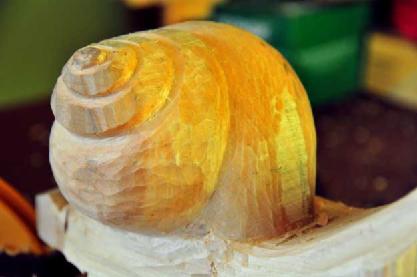
Finally plenty of sanding was required to his
body followed by some sanding sealer and a
buff with micro crystalline wax
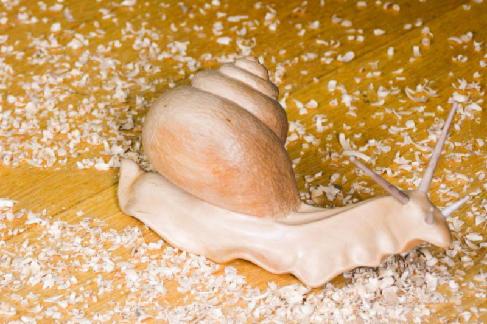
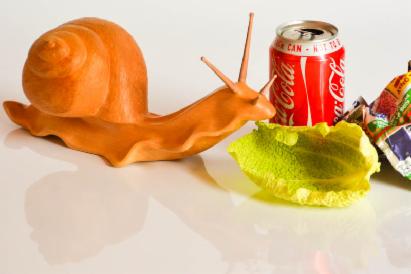
Then he made off through the sawdust to explore!
He quickly found something to snack on...

Jean Grace
body followed by some sanding sealer and a
buff with micro crystalline wax
Then he made off through the sawdust to explore!
He quickly found something to snack on...
Jean Grace